Self-Service SSO with a SAML-based IdP
Configure a SAML-based identity provider
Self-service single sign-on (SSO) is only available for organizations with Dedicated and Enterprise plans who previously set up their SSO using PingOne and need to migrate. If you're unsure if you need to migrate please see the Migration Guide. If you are setting up SSO for the first time, please refer to these instructions.
This guide walks through configuring a generic SAML-based identity provider (IdP) for use with Apollo SSO. If you use Okta or Microsoft Entra ID as your IdP, instead see the corresponding guide for your IdP:
- Okta
- Microsoft Entra ID (formerly known as Azure Active Directory)
Migration notes
⚠️ CAUTION
If your organization's SSO was set up before April 2024, you must create a new SSO configuration with the updated instructions before November 15, 2024. After November 15, 2024, the legacy configuration will no longer work, and your organization will lose access to GraphOS if you haven't created a new configuration.
To migrate from a legacy configuration, a GraphOS Org Admin must create a new SSO configuration. You can create a new configuration while the legacy configuration continues to provide SSO for your organization.
The GraphOS setup wizard takes you through the configuration process, step-by-step. It won't let you activate your new configuration until it has confirmed that you're able to sign in with it.

Once the new configuration is verified and active, you should remove any legacy configurations from your IdP.
Prerequisites
Setup requires:
- Administrative access to your IdP
- A GraphOS user account with the Org Admin role
Setup
SAML-based SSO setup has these steps:
- Enter your SSO details in GraphOS Studio.
- Create a custom application for GraphOS in your IdP.
- Share your application's SAML metadata in GraphOS Studio.
- Verify and configure OIDC details.
- Verify your SSO configuration works.
- Enable SSO in GraphOS Studio.
The SSO setup wizard in GraphOS Studio guides you through these steps.
Step 1. Enter your SSO details
- Go to GraphOS Studio. Open the Settings page from the top navigation. Open the Security tab from the left sidebar and click Migrate SSO. A setup wizard appears.
- Enter the Email domain(s) you are setting SSO up for. Click Continue.
- Select SAML as the SSO type. Click Continue.
Step 2. Create a custom application
Once you reach Step 2: Configure Your IdP in the wizard, open your IdP's admin dashboard in a separate browser tab.
Create a new application. While doing so, set the following values:
- App Name:
Apollo GraphOS - Logo: Apollo logo (optional)
- App Name:
If your IdP permits it, upload the SAML XML metadata file provided by the GraphOS setup wizard. Otherwise, manually enter the following metadata values in your IdP:
Set your Single Sign-on URL or ACS URL to the Single Sign-on URL provided by the wizard. You can also use this value for the following fields:
- Recipient
- ACS (Consumer) URL Validator
- ACS (Consumer) URL
Set your Entity ID to the Entity ID value provided by the wizard.
Set the following user attributes:
sub:user.email- The
subattribute should uniquely identify any particular user to GraphOS. In most cases,user.emailoruser.mailprovides this unique mapping.
- The
email: Your IdP's email attribute, often something likeuser.emailgiven_name: Your IdP's first name attribute, often something likeuser.firstNamefamily_name: Your IdP's last name attribute,often something likeuser.lastName
Save the configuration in your IdP.
In the GraphOS setup wizard, select whether your IdP requires signing an AuthnRequest.
Click Next.
Step 3. Share SAML metadata with Apollo
In the GraphOS setup wizard, enter your application's metadata URL or metadata file. Consult your IdP's documentation if you need assistance finding it. Click Next.
Step 4. Verify details
The GraphOS Studio setup wizard populates your SSO metadata based on the URL you entered in the last step. Verify the values are correct. Consult your IdP's documentation if you need assistance finding them.
Once you've verified the values or corrected them, click Next.
Step 5. Verify SSO Configuration
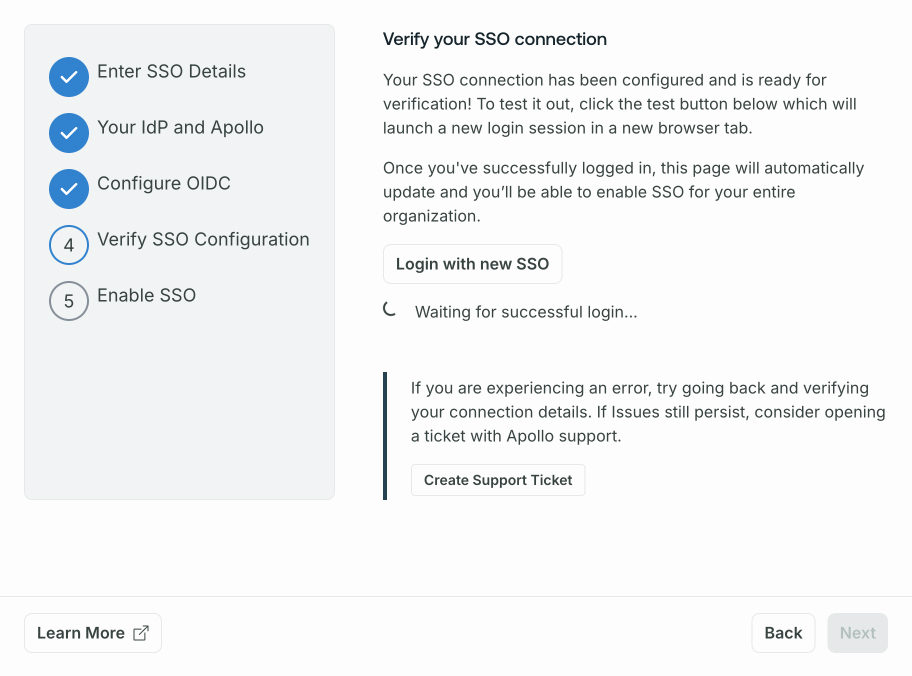
To verify that your SSO configuration works, click Login with new SSO in the GraphOS Studio wizard. This button launches a new login session in a new browser tab. Once you successfully login using your new configuration, click Next.
Step 6. Enable SSO
In the setup wizard, click the Complete button to finalize setup.
Once you click Complete, all users will be logged out of your organization, and will need to sign in again from https://studio.apollographql.com/login using SSO. To give them access, ensure you've assigned them to your new application in your IdP.
Once you've confirmed the new configuration works as expected, remove any legacy Apollo applications in your IdP if you have them.
Assign users in your IdP
Once your SSO setup is live, assign users to your new Apollo GraphOS application in your IdP. Consult your IdP documentation if necessary. For help assigning the relevant groups and users, contact your SSO or Identity & Access Management team.
Legacy setup
ⓘ NOTE
The below instructions are provided for reference only. Beginning in April 2024, Apollo recommends that all organizations use the updated instructions to create a new SSO connection.
To use multi-organization SSO, your SSO connection cannot use PingOne as shown in the legacy instructions below. Follow the updated instructions to create a new SSO connection.